
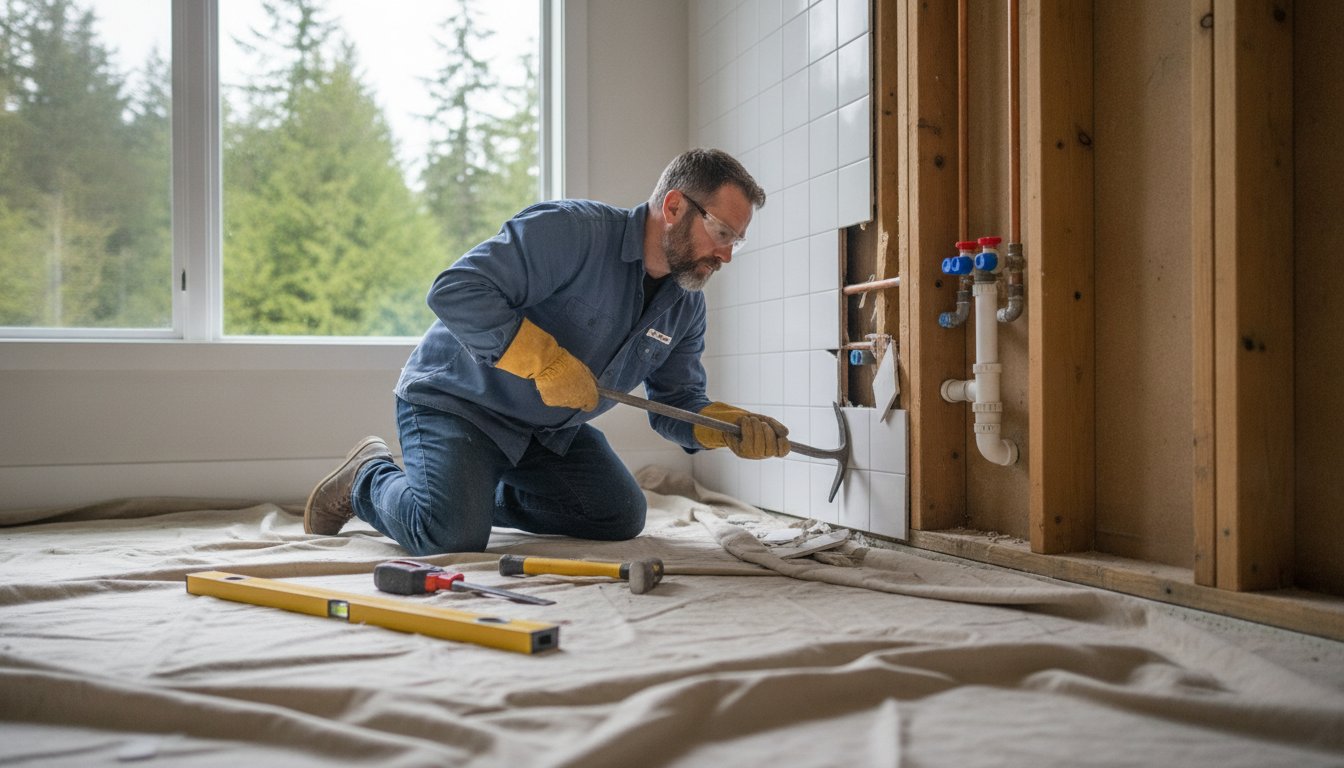

Recent 2026 data reveals that 32% of homeowners watched their renovation budgets vanish due to avoidable mistakes during the initial teardown phase. It's a common trap when starting a small bathroom demolition. While it's tempting to just start swinging a hammer, success is defined by how well you protect your plumbing and electrical systems. A single mistake with a hidden pipe can cost thousands, making careful preparation your most valuable tool.
It's completely normal to feel uneasy about what's lurking behind those old tiles, especially with the risks of asbestos or mold in many local properties. You need more than just a gutting; you need a space that's perfectly prepped for its next chapter without the headache of heavy debris. This guide provides a clear roadmap to help you navigate the demolition process safely and legally. We'll cover everything from protecting your home's structure to managing efficient waste disposal, ensuring you're ready to build on a solid, clean foundation.
Key Takeaways
- Learn why a surgical, top-down strategy is more effective than a sledgehammer when planning your small bathroom demolition.
- Identify hidden risks like asbestos and mold common in older BC homes to protect your health and your property's value.
- Master the essential steps for safely capping utility lines to prevent expensive water or electrical damage during the teardown.
- Discover efficient ways to manage heavy debris by sorting materials like porcelain and tile for faster, legal disposal.
- Understand when a project requires certified professional expertise to ensure the space is perfectly prepped for your new renovation.
Preparing for Your Small Bathroom Demolition in 2026
A successful small bathroom demolition is a strategic process, not a chaotic smash-fest. It involves the methodical removal of fixtures, flooring, and wall coverings to reveal the "bones" of the room. Modern Demolition practices prioritize safety and precision over raw force. Instead of swinging a heavy sledgehammer, you should focus on a "surgical" approach. This method protects the underlying plumbing and electrical systems that you likely plan to keep. It also ensures you don't accidentally punch through the drywall of an adjacent bedroom or hallway.
Planning your budget is just as important as planning your physical labor. While you're reviewing small demolitions pricing, remember that thorough prep work saves money by preventing accidental damage. Taking the time to seal HVAC vents and set up dust barriers prevents fine particles from settling into your carpets and furniture throughout the rest of the house. It's much easier to contain the mess now than to pay for professional house-wide cleaning later.
To better understand this concept, watch this helpful video:
The Essential Tool Checklist
You can't perform a clean gut job without the right equipment. Safety is your first priority. You'll need a high-quality respirator, preferably N95 or P100 rated, to protect your lungs from dust and potential mold spores. Heavy-duty gloves and impact-resistant eye protection are non-negotiable. For the work itself, a sturdy pry bar and a reciprocating saw are your most versatile assets. While power tools speed up the process, a simple floor scraper is often the best way to remove stubborn tile adhesive. Finally, keep a high-capacity shop-vac running constantly. It's your best friend for maintaining visibility and keeping the workspace manageable.
Protecting the Rest of Your Home
Dust is the enemy of any indoor renovation. You can create a "dust airlock" by hanging heavy 6-mil plastic sheeting over the bathroom doorway with painters tape. This simple barrier keeps debris localized. You also need to protect the high-traffic flooring between the bathroom and your home's exit. Lay down Ram Board or thick drop cloths to prevent scratches from dropped tiles or heavy boots. Before you start, clear a wide path through your hallways. Removing furniture and wall decor ensures you can carry out heavy fixtures like toilets or vanities without causing unnecessary scuffs or breaks in other rooms.
Step-by-Step: How to Demo a Small Bathroom Safely
Execution is where your planning meets reality. To keep the project manageable and safe, always follow the "Top-Down" rule. This means you start with the ceiling and lighting fixtures before moving to the walls and eventually the flooring. Gravity is a powerful force; by clearing the upper levels first, you prevent heavy debris from crashing down onto areas where you're actively working. This sequence keeps your workspace clearer and reduces the risk of tripping over piles of drywall while you're trying to disconnect a heavy vanity.
Safety shouldn't be a secondary thought. Following established OSHA demolition safety guidelines ensures that you're accounting for structural stability and respiratory health. Before any major debris hits the floor, you must cap all utility lines. Capping plumbing and electrical lines isn't just about convenience. It's a critical safety step that prevents accidental floods or electrical fires if a tool slips. If you're dealing with a particularly cramped layout or a complex "gut" job, it's often safer to rely on professional demolition services to handle the heavy lifting and technical disconnections.
Step 1: Utility Disconnection
Don't assume your shut-off valves work perfectly. Test the valves under the sink and behind the toilet by turning them off and checking for any drips. If they're frozen or leaking, you'll need to turn off the main water supply to the house. For electrical safety, identify the specific circuits for the bathroom at your breaker panel. Use a non-contact voltage tester to verify that every outlet and light switch is truly "dead" before you pull them out. If you encounter a "mystery pipe" behind a wall that doesn't seem to lead to a fixture, stop immediately. It could be a vent stack or a gas line that requires expert assessment before you proceed.
Step 2: Fixture and Tile Removal
Start with the easy wins. Remove the toilet and vanity first to open up floor space. When removing a vanity, cut the caulk along the backsplash with a utility knife to avoid tearing the drywall paper. For wall tiles, the "Score and Snap" method works best. Use a reciprocating saw to cut through the grout lines and the backer board simultaneously, allowing you to pull off large sections rather than chipping away individual tiles. Handling a bathtub depends on its material. Modern acrylic inserts are light enough for two people to lift, but old cast iron tubs are incredibly heavy. You may need to safely break a cast iron tub into smaller pieces with a sledgehammer, provided you're wearing full face and body protection. If the physical demands of the job feel overwhelming, reaching out for a professional assessment can keep your project on track and injury-free.

Hidden Dangers: Asbestos, Mold, and Structural Integrity
A small bathroom demolition often reveals more than just old plumbing. In our local Vancouver Island communities, homes built before 1990 frequently hide hazardous materials that require specialized handling. You can't always see the risks; they're often baked into the very materials you're trying to remove. Ignoring these dangers doesn't just stall your project. It can lead to long-term health issues and significant legal liabilities if handled incorrectly. Success in this phase means knowing when to keep working and when to step back for a professional assessment.
Before you remove a single wall, you must identify if it's load-bearing. In small layouts, it's a common mistake to assume every partition is decorative. Removing a structural stud without proper shoring can cause your ceiling to sag or even collapse. You can usually check this by looking in your attic or crawlspace to see which way the floor joists run. If the wall runs perpendicular to the joists, it's likely supporting the weight of the house. For more detailed safety advice on managing these complexities, review this Hiring Demolition Contractors guide.
Asbestos Awareness for BC Homeowners
Nanaimo and Duncan have a high concentration of character homes and mid-century builds. In these properties, asbestos is frequently found in drywall joint compound (mud), vinyl floor tiles, and even the adhesive used for old mirrors. In British Columbia, you're legally required to conduct a hazardous materials survey before starting a renovation that disturbs these surfaces. If your home was built before 1990, don't take chances. If you encounter brittle insulation or "popcorn" ceiling textures, stop immediately. You need a certified abatement professional to test the air and materials to ensure your home remains habitable.
Dealing with Water Damage and Rot
Bathrooms are moisture magnets, and small spaces often suffer from poor ventilation. When you pull up old flooring, look closely at the subfloor around the toilet flange and the shower base. If the wood is dark, soft, or smells earthy, you've found rot. Never "power through" a section of black mold by simply bleaching it. Mold is a symptom of a leak or a failed seal that must be repaired. If a wall stud is structurally sound but has surface staining, it might just need a thorough drying and an antimicrobial treatment. However, if the wood fibers are crumbly, the stud must be replaced. Starting your new build on a clean, dry, and structurally sound foundation is the only way to ensure your renovation lasts for decades.
The Logistical Headache: Junk Removal and Disposal
A small bathroom demolition creates a mountain of waste that often shocks property owners. While the room itself is compact, the materials are incredibly dense. A single standard toilet weighs about 90 pounds, and an old cast iron tub can easily exceed 300 pounds. When you add layers of heavy tile, mortar, and drywall, you're dealing with thousands of pounds of debris. Managing this volume requires a clear plan for sorting and hauling before the first tile is even pried loose.
Sorting your waste is the most effective way to manage disposal costs and environmental impact. Keep metal pipes and fixtures separate, as these can often be recycled. Porcelain from toilets and sinks, wood from framing, and drywall all have different disposal requirements at local facilities. You have several options for getting rid of the mess. Retail waste bags are convenient for small amounts of light trash, while bin rentals work well if you have the driveway space. However, for the heavy, awkward items typical of a bathroom gut, professional junk removal services for demolition debris are often the most efficient choice because they include the labor of carrying those heavy loads out of your home.
Local Disposal Rules in Nanaimo and Cowichan
Regional landfills in Nanaimo and the Cowichan Valley have strict regulations regarding construction waste. Drywall is a primary concern. Many local transfer stations require proof of age or a clean asbestos test before they'll accept it, as discussed in our previous section on hidden hazards. If you mix hazardous materials or unapproved drywall with general trash, you risk heavy fines or a rejected load. Properly bagging fine debris and securing your trailer loads is essential for legal transport. Professional haulers understand these regional nuances and handle the paperwork for you, ensuring your waste is disposed of safely and responsibly.
Final Site Cleanup and Preparation
The difference between a "demoed" room and a "ready-to-build" space lies in the details. You must remove every single nail, screw, and staple from the wall studs and floor joists. If you leave even one protruding fastener, your new drywall or subfloor won't sit flush, which leads to cracks or squeaks later. Use a high-powered vacuum to clear out the wall cavities and floor tracks. This step removes years of accumulated dust and potential allergens. Finally, scrape away all old adhesive or thin-set residue from the subfloor. A perfectly level and clean surface is the best gift you can give your installation team. If the cleanup feels like too much to handle, consider booking our professional junk removal to clear the site completely.
Professional Help: When to Call JBM Custom Contracting
While a DIY approach can save on labor costs, many homeowners in Nanaimo find that a professional small bathroom demolition offers far better value. Your home is your biggest asset, and mistakes made during a "surgical" teardown can have long-lasting consequences. We bring a level of precision that ensures your plumbing and electrical systems remain protected while the unwanted materials are removed. Our team is certified and fully insured, which provides essential peace of mind when we're working in the heart of your house.
One of the biggest advantages of working with us is our integrated approach. We don't just leave you with a pile of debris to figure out later. We handle the teardown and the junk removal in one seamless visit. This eliminates the need to coordinate multiple contractors or live with a dumpster in your driveway for weeks. When we're finished, your space isn't just empty; it's professionally prepped for the next phase of your renovation. By managing the process from start to finish, we ensure that no hazardous materials or heavy fixtures are left behind to stall your progress.
The "Done-in-a-Day" Advantage
A typical small bathroom demolition can take an inexperienced individual several days to complete when you factor in the physical labor and multiple trips to the landfill. Our professional team often completes a full gut in a fraction of that time. This speed is about more than just convenience. It's about minimizing the "demolition zone" impact on your family's daily life. We use professional-grade dust containment systems and HEPA filtration to ensure that fine particles don't migrate into your living areas. You get a clean, ready-to-build space without the weeks of stress and mess that usually accompany a renovation.
Beyond Demolition: Total Property Care
Success in a renovation is defined by how well the next trade can do their job. We focus on preparing the site so your plumbers and tilers can start immediately on a level, debris-free surface. Our commitment to your property doesn't end at the bathroom door. Demolition is a heavy process that often leaves tracks on driveways or dust on exterior walkways. We can assist with other maintenance needs, such as pressure washing, to ensure your entire property looks its best after the interior work is done. If you're planning a project for 2026, contact us today for a no-nonsense demolition estimate to get started on the right foot.
Ready to Start Your 2026 Bathroom Transformation?
A successful renovation starts with a clean slate. You've learned that a small bathroom demolition is about more than just clearing space; it's about protecting your home's infrastructure and your family's health. By identifying hidden dangers like asbestos before they become a problem and managing the heavy logistics of disposal, you set a solid foundation for everything that comes next. Whether you're handling the prep yourself or looking for expert support, precision is your most valuable asset. A well-executed teardown prevents the budget overruns that often plague local projects.
JBM Custom Contracting is here to ensure your project begins without a hitch. As local Vancouver Island experts, we're fully certified and insured to handle the toughest "surgical" teardowns. We offer a 5-star junk removal and demolition integration that leaves your space perfectly prepped and debris-free in record time. Our team understands the specific regulations in Nanaimo and the Cowichan Valley, taking the guesswork out of waste management.
Get a Professional Bathroom Demolition Quote from JBM Custom Contracting today. It's time to clear away the old and make room for the beautiful, spa-inspired retreat you've been planning for 2026. Your dream bathroom is just one clean demo away.
Frequently Asked Questions
Do I need a permit for a small bathroom demolition on Vancouver Island?
You generally need a building permit if your project involves moving plumbing lines, electrical circuits, or structural walls. Simple cosmetic demolition, such as removing a vanity or old floor tile, often does not require one. However, you should always check with your local building department in Nanaimo or Duncan, as requirements can change based on the scope of your 2026 renovation.
How long does it typically take to gut a 5x8 bathroom?
A professional crew can usually complete a full gut of a 5x8 bathroom in 6 to 8 hours. If you are tackling this as a DIY project, expect to spend 12 to 15 hours of physical labor. This timeline accounts for the methodical removal of fixtures, wall coverings, and flooring, though finding hidden water damage can extend the process.
Can I leave the toilet in place while I demo the rest of the bathroom?
It is highly recommended to remove the toilet before you begin a small bathroom demolition. Leaving it in place creates a major tripping hazard and makes it difficult to remove flooring or wall materials behind the tank. Removing it first protects the fixture from damage and gives you the clear floor space needed to work safely and efficiently.
What is the safest way to remove old floor tiles?
The safest method is to use a long-handled floor scraper or a hammer and masonry chisel while wearing full respiratory and eye protection. You should work in small sections to prevent the subfloor from splintering. If your home was built before 1990, you must have the tile and adhesive tested for asbestos before you begin any removal to avoid releasing hazardous fibers.
How do I know if my bathroom walls contain asbestos?
Laboratory testing is the only way to confirm if your walls contain asbestos. In British Columbia, a hazardous materials survey is a legal requirement for homes built before 1990 prior to any demolition work. Asbestos is frequently found in the drywall joint compound (mud) and the backing of old vinyl wallpaper used in mid-century Vancouver Island homes.
Should I remove the drywall on the ceiling during a bathroom demo?
You should only remove the ceiling drywall if you are relocating the vanity light, installing a new exhaust fan, or if there is visible water damage. If the ceiling is structurally sound and your layout isn't changing, leaving it intact significantly reduces the amount of dust and debris. This choice saves you time on both the teardown and the eventual re-installation.
What happens if I find mold behind my shower walls?
If you discover mold, you must stop and identify the moisture source, such as a leaking pipe or failed grout, before continuing. Industry standards like the IICRC S520 guide the safe removal of contaminated materials. While surface mold on studs can sometimes be treated, any crumbly or rotted wood must be replaced to ensure your new shower has a solid foundation.
How much debris does a small bathroom demolition actually produce?
A typical small bathroom demolition produces between 500 and 1,000 pounds of waste. Although the room is small, the weight of porcelain fixtures, mortar, and heavy floor tiles adds up very quickly. You will likely fill a small utility trailer or several heavy-duty construction bags, so planning your hauling strategy before you start is essential for a clean site.