


Why can cabinet removal cost more in one kitchen than another? For cabinet removal for a kitchen remodel, the kitchen’s size and the length of its cabinet runs shape the amount of work involved. Keeping countertops in place, dealing with tight access, and working around plumbing or appliances can also affect the job’s scope.
It makes sense to want a clear idea of the cost before renovation work begins. A useful estimate reflects the kitchen and what needs to come out, rather than treating every cabinet removal as the same task.
This guide explains how kitchen and cabinet size affect costs, what skills and tools professional removal takes, and what can influence the time required. You’ll also learn how cabinets are detached safely, what can complicate removal, and when a renovation or demolition professional can help keep the work controlled and the surrounding kitchen protected.
Key Takeaways
- Estimate removal scope by considering kitchen area, cabinet run length, and whether countertops or appliances need to stay in place.
- Expect the time and complexity to depend on cabinet construction, access, and any plumbing or electrical connections nearby.
- Professionals separate cabinets from each other and the wall in a controlled order to help protect surrounding surfaces.
- Plan utility disconnections as part of the project, especially around sinks, dishwashers, and built-in appliances.
- Choose renovation or demolition support when cabinets are difficult to access or the removal is part of broader kitchen work.
Professional cabinet removal: difficulty, tools, and what to expect
A contractor may remove countertops when they’re being replaced or can’t remain safely supported during cabinet removal. Appliances may need to be moved first if they block access or are part of the renovation.
- Assess the kitchen before starting. Identify which cabinets are staying, whether countertops must remain, and where appliances or plumbing limit access. A base cabinet beneath a retained countertop requires a different approach from an empty cabinet run. This assessment also reveals tight corners, delicate wall finishes, and cabinet sections fastened together.
- Prepare the work area and choose the right tools. A professional may use a drill or driver for screws, a utility knife to score caulk, and a pry bar for trim or stubborn joints. Drop cloths and protective coverings help shield nearby floors and surfaces. Tool choices depend on how the cabinets were installed, including whether adhesive holds them to the wall.
- Plan for weight and awkward handling. Upper cabinets are removed with a capable assistant supporting the unit as the final screws come out. Cabinets are emptied and doors secured or removed before lifting, reducing shifting and improving access. The contractor also considers the cabinet’s size and contents, then clears a safe route through the kitchen before carrying it away.
- Handle countertops and appliances as part of the sequence. If base cabinets must come out while a countertop stays, access its fasteners and separate the adhesive bond before lifting or supporting the counter. Flooring installed after the cabinets can trap a dishwasher, so check its clearance before pulling it out. These details can change the order of work.
- Expect careful removal, not just force. A heat gun can soften adhesive on glued cabinets before controlled prying begins. The contractor protects the wall and adjacent cabinets while loosening connections, then sorts the removed material for disposal. If debris needs to leave the property, junk removal can help clear the renovation waste. For older materials, powdery white lead corrosion products can become airborne and create contact or inhalation risks, according to the Canadian Conservation Institute, Government of Canada.
How professionals detach cabinets from walls and adjacent cabinets
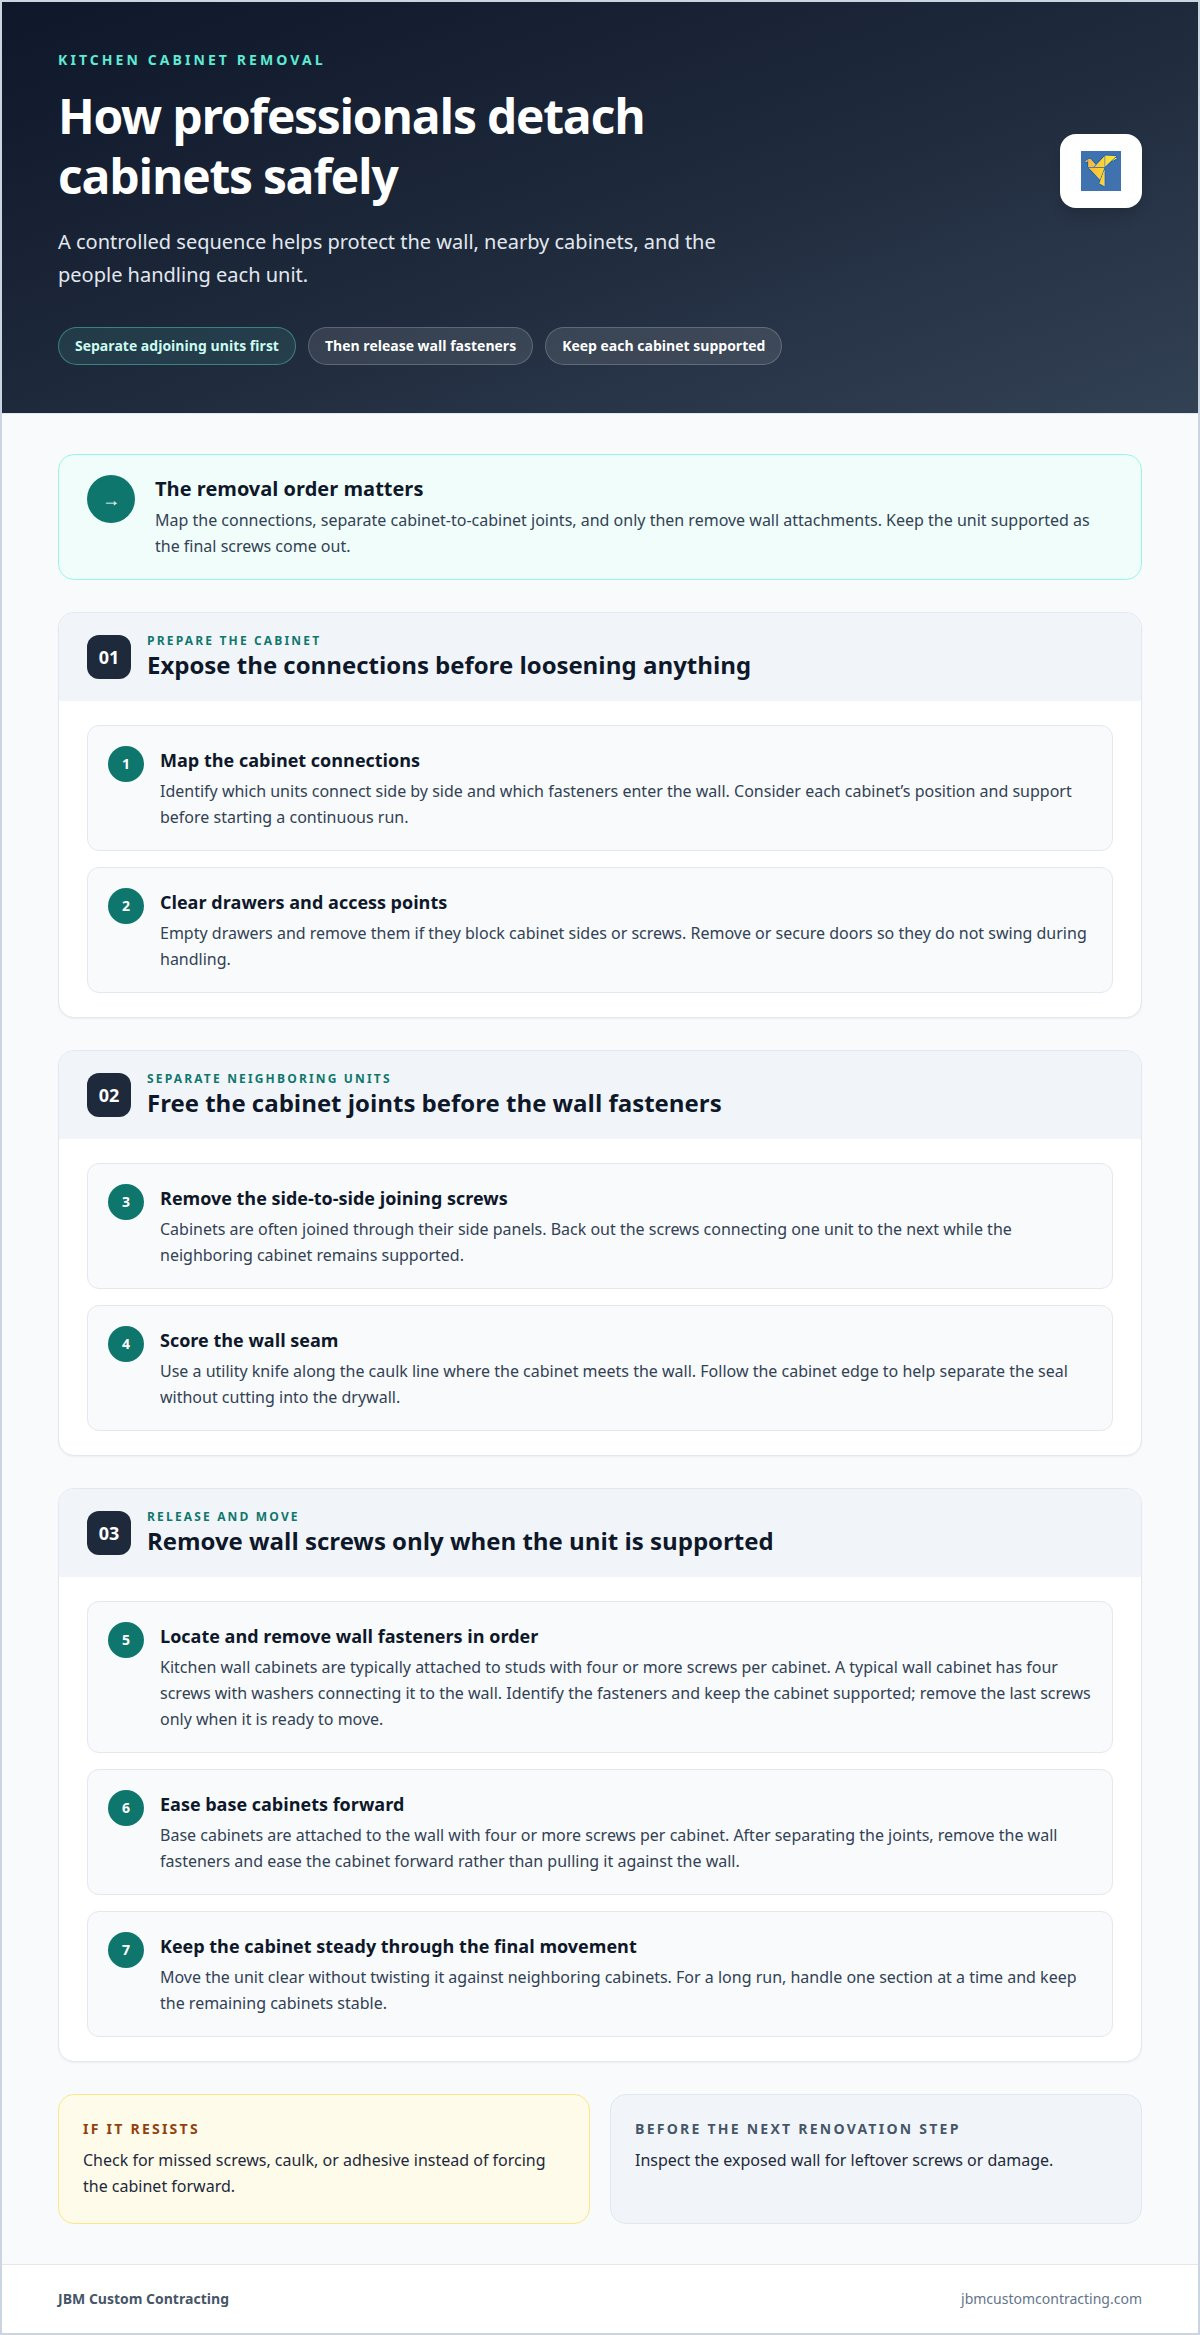
- Map the cabinet connections before loosening anything. Identify which units connect side by side and which fasteners enter the wall. Removing wall screws first can leave neighbouring cabinets carrying unexpected weight. Start by separating cabinet-to-cabinet connections, then release the wall attachments. For a continuous run, consider each unit’s position and support before work begins.
- Clear drawers and open the fastener areas. Empty drawers and remove them if they block access to cabinet sides or screws. Doors may also be removed or secured so they don’t swing during handling. With the drawers out, the cabinet interior and joining points are easier to reach, and there’s less risk of forcing tools into a crowded space.
- Separate adjoining units first. Cabinets are often joined through their side panels. Remove the screws connecting one unit to the next before tackling the wall fasteners. A driver can back out those screws while the neighbouring cabinet remains supported. This order helps prevent units from pulling against each other as the first one moves.
- Cut the wall seal carefully. Score the caulk line where the cabinet meets the wall with a utility knife. This creates a clean separation and helps reduce damage to the wall finish. Follow the cabinet edge rather than cutting into the drywall. If paint or caulk still holds a section, work along the seam before applying steady pressure.
- Locate and remove wall screws in a controlled order. Kitchen wall cabinets are typically attached to studs with four or more screws per cabinet. A typical wall cabinet has four screws with washers connecting it to the wall. Identify each fastener and keep the cabinet supported while removing them. Take out the last screws only when the unit is ready to move.
- Release base cabinets without pulling against the wall. Base cabinets are attached to the wall with four or more screws per cabinet. After separating the cabinet-to-cabinet joints, remove the wall fasteners and ease the unit forward. If it resists, check for missed screws, caulk, or adhesive instead of forcing it. This helps protect the wall and cabinet edges.
- Keep each cabinet supported through the final movement. Once the fasteners are removed, move the unit clear without twisting it against neighbouring cabinets. For a long run, handle one section at a time and keep the remaining cabinets stable. Inspect the exposed wall for leftover screws or damage before starting the next renovation step.
Project time, skill level, and estimated cost
Plan removal around the kitchen’s scope, access, and what must remain undamaged. These factors help define the schedule, skills, and cost.
-
Estimate Project Time
Ask for a schedule based on the cabinet run, room access, and whether countertops or appliances remain. A standard kitchen cabinet removal typically takes 3 to 6 hours, while professionals often finish within a few hours. A small or medium kitchen can take about half a day with an assistant. Allow more time if cabinets are difficult to reach or attached with adhesive.
-
Assess the Required Skill Level
Identify work that requires controlled lifting, careful separation, or protection for nearby finishes. An empty, straightforward cabinet run presents fewer challenges than cabinets beneath a countertop that must stay. Extra care is needed when cabinets are glued, tightly fitted, or awkward to move. Avoid using force: a poor move can damage the wall, countertop, or neighbouring unit.
-
Estimate Project Cost
Request an estimate based on the actual scope, not just the cabinet count. Project cost depends on kitchen size, cabinet length, access, disposal needs, and whether countertops or appliances must be moved or retained. Adhesive or tight clearances can also add work. JBM Custom Contracting prepares a written estimate based on the scope, site conditions, and details provided.
- Separate removal time from renovation time. Cabinet removal is one stage, not the entire kitchen remodel. The schedule should identify when the work begins and ends, and whether another task must happen first. For example, retaining a countertop can require extra preparation before base cabinets move. Clear sequencing helps ensure the kitchen is ready for the removal stage.
- Include access and handling in the schedule. A clear path from the kitchen to the removal area helps materials move efficiently. Narrow doorways, stairs, or limited staging space can slow carrying and sorting. Include these conditions in the work plan. A cabinet dismantled in place may need different handling from one moved intact.
- Use the estimate to define the job. Confirm which cabinets are coming out, what stays, and whether debris removal is included. A written scope helps distinguish cabinet removal from broader demolition or renovation work. It also clarifies whether preparation, countertop handling, and appliance movement belong to this stage or another. Those details make the proposed schedule and cost easier to understand.
Removal costs by kitchen and cabinet size
Kitchen area and cabinet length help define the removal scope. The size examples below show how a larger cabinet run can add work.
- Match the kitchen to a size range. A kitchen measuring 70-100 square feet may have 12-20 linear feet of cabinetry. A 100-200-square-foot kitchen may have 20-30 linear feet. These ranges help describe the project, but they don’t determine a specific quote by themselves.
- Account for larger cabinet runs. A 200-400-square-foot kitchen may contain 30-50 linear feet of cabinetry. More cabinets can mean more connections to separate, more units to handle, and more material to move. The layout matters too: cabinets around corners or built into tight spaces can take more care than a straight run.
- Define what stays in a partial remodel. A partial remodel removes selected cabinets while protecting the units, countertops, and finishes that remain. That careful separation affects the work involved. A full renovation may include the complete cabinet run and related demolition, so its scope is broader than removing only a few units.
- Set the scope before estimating cost. JBM Custom Contracting provides pricing in a written estimate based on the project details. Kitchen size, cabinet length, access, countertop handling, appliance movement, and debris removal all affect the work. Specify which cabinets come out and what must stay so the estimate reflects the actual job.
- Separate cabinet removal from other renovation work. Permit and building-code requirements depend on the work involved, not simply the cabinet count. Removing cabinets differs from changing plumbing, electrical, gas, or structural elements, which can involve separate requirements. Don’t assume a cabinet-removal estimate covers those additional trades or approvals.
- Plan how removed cabinets will be handled. Reuse or donation may suit cabinets that remain intact and usable. Recycling or disposal may be more appropriate for damaged units or mixed materials. Sort cabinets and hardware by condition, then include the chosen handling method in the project scope.
- Address lifting, tipping, and debris risks. Cabinets are heavy and awkward, so the removal plan needs stable support during handling. Unsecured doors can shift, and loose debris can obstruct the work area. Also consider dust and older materials. The Canadian Conservation Institute, Government of Canada, notes that powdery white lead corrosion products can become airborne and pose contact and inhalation risks.
How do professionals arrange disconnection of plumbing, gas, and electrical services before cabinet removal?
Before cabinets move, the work plan identifies every nearby utility connection. Professionals coordinate disconnection and appliance removal before loosening cabinets around sinks, dishwashers, or cooktops.
- Map connections around the cabinet run. Identify the sink, dishwasher, garbage disposal, and any gas-connected appliance near the cabinets. This helps establish what must be disconnected before removal begins. A sink base, for example, needs a different sequence from a cabinet with no plumbing or appliance connections.
- Arrange water disconnection at the sink. Before removing cabinets near the sink, shut off the water supply. Carefully disconnect the drain pipes and supply lines. Account for these connections before moving the sink base to help prevent pipes from being pulled or damaged during cabinet removal.
- Prepare the sink and disposal. Before removing the sink, turn off and disconnect its water supply lines, and unplug the garbage disposal. Handle these steps before lifting or shifting the sink cabinet. A clear sequence helps avoid moving a cabinet while plumbing or an electrical connection remains attached.
- Address the dishwasher circuit. Turn off the dishwasher circuit breaker before uninstalling the dishwasher. Plan the appliance’s removal around nearby cabinets and available clearance. If flooring edges prevent the dishwasher from sliding out, address that obstruction before cabinet work proceeds.
- Identify electrical connections beyond the dishwasher. Note any appliance or electrical connection that cabinet removal could affect. Don’t pull a connected unit away with a cabinet. Arrange disconnection before moving nearby materials so appliance and cabinet work happen in the right order.
- Include gas connections in the work sequence. If a cooktop or other gas-connected appliance is near the cabinets, identify its connection before removal. The appliance must be disconnected before it is moved, so arrange the appropriate gas service work first. Don’t force cabinets around an attached appliance or connection.
- Confirm connections are clear before removal. Before moving a cabinet, check for remaining supply lines, drain pipes, appliance cords, and gas connections. This final check helps prevent the cabinet from catching on utilities and confirms that appliance and cabinet removal follow the planned sequence.
- Coordinate utility work with the renovation schedule. Disconnections need to happen before the appliance or cabinet is moved, while access is still available. For example, turn off the dishwasher circuit before uninstalling the appliance. Schedule each disconnection ahead of the removal task it affects.
JBM Custom Contracting
JBM Custom Contracting helps homeowners plan kitchen work through its renovation and demolition services. If cabinet removal is part of a larger remodel, the team can help coordinate the removal scope and clear unwanted materials through junk removal. This support is useful when several cabinet sections are coming out or removal needs to fit into broader renovation work.
Share which cabinets are being removed, what must stay, and whether appliances or countertops are part of the work. These details help define the project and its next steps.
Set up the next stage of your kitchen remodel
Before cabinet removal for a kitchen remodel begins, decide what should happen immediately afterward. A clear handoff helps keep the work moving: identify which areas need to be accessible, what materials must leave the property, and when the next renovation tasks can start. Share those priorities when planning the project.
Think beyond the empty space left by the cabinets. Consider how removal fits into the wider project, including the condition of exposed walls and the space needed for upcoming work. Making these decisions early can help organize the transition from removal to renovation.
JBM Custom Contracting can discuss how cabinet removal fits into your renovation plans and the work involved. Contact JBM Custom Contracting today to talk through your project’s next step.
A well-planned start gives your kitchen remodel a clearer path forward.
Frequently Asked Questions
How much does it cost to remove kitchen cabinets?
There isn’t one price that fits every kitchen. Cost depends on the cabinet run, access, countertop and appliance handling, and debris removal. For cabinet removal for a kitchen remodel, a short, clear run differs from cabinets beneath a countertop that must stay. JBM Custom Contracting provides a written estimate based on the scope and site conditions.
How much does kitchen cabinet removal cost in Canada?
In Canada, cabinet removal costs depend on the kitchen and the work included, rather than a single national rate. Local access, cabinet dimensions, disposal needs, and whether the work is part of a larger renovation all affect the estimate. For a Nanaimo project, describe which cabinets are coming out and what must remain. That gives the estimate a clearer scope without relying on a generic figure.
What affects the cost of removing kitchen cabinets?
The main factors are cabinet length, kitchen layout, access, and what needs protection or removal. Keeping a countertop in place may require extra handling, while a dishwasher blocked by flooring can complicate the sequence. Disposal also affects the scope, especially if cabinets are damaged or mixed with other renovation debris. Specify what stays, what goes, and any tight access points when describing the project.
Should I remove kitchen cabinets myself or hire a contractor?
Hire a contractor if cabinets are heavy, awkward to move, attached with adhesive, or close to plumbing and appliances. Professional help can be especially useful for cabinet removal for a kitchen remodel when countertops or neighbouring cabinets must remain undamaged. DIY removal may suit someone with the right tools, lifting help, and experience, but mistakes can harm walls, floors, or retained units. Consider the damage risk and scope, not just the time involved.
What tools and steps do professionals use to remove kitchen cabinets safely?
Professionals commonly use a driver, utility knife, and pry bar, choosing tools to suit the fasteners and cabinet construction. They clear contents, expose connections, and separate adjoining units before releasing wall attachments. For a glued cabinet, controlled heat may soften adhesive before careful prying. The sequence also accounts for stable support and a clear carrying path to prevent units shifting unexpectedly.
How do professionals remove cabinets without damaging walls, floors, or countertops?
Protect nearby surfaces, cut caulk along cabinet edges, and loosen connections rather than pulling forcefully. If a countertop stays, attend to its supports and attachment points before moving base cabinets. Protective coverings can help shield floors along the removal route. Pause if a cabinet resists movement: a hidden screw, adhesive bond, or connected appliance may be holding it in place.
How long does kitchen cabinet removal take?
A standard removal typically takes 3 to 6 hours, though the actual schedule depends on the kitchen’s layout and what must stay in place. A straightforward cabinet run can move faster than a job involving retained countertops, blocked appliances, or difficult access. The work plan should distinguish cabinet removal from follow-on renovation tasks, so the time estimate covers the intended scope rather than the entire remodel.


