

Last month, a homeowner in Nanaimo stood in their cramped 1970s kitchen, staring at a single partition wall that blocked every drop of natural light from the living room. It seemed like a small barrier, but the fear of a structural mistake or a burst pipe kept the sledgehammer in the garage. You likely feel the same way about your own space. You want that modern, open-concept layout, but the anxiety of hidden electrical wires or the dread of a dust-covered house is holding you back. It's a common concern for many residents across the Central Island who want to modernize their homes without the stress.
In this guide, you'll learn the professional process for removing a non load bearing wall safely and efficiently. We'll walk you through how to identify partition walls, manage local permit requirements in Duncan, and ensure your home remains a clean, safe environment throughout the renovation. From initial inspection to hauling away the final load of debris, we provide the clarity you need to move forward with confidence. This article outlines the exact steps to achieve a beautiful, open floor plan while keeping your property secure and your project on track.
Understanding Non-Load Bearing Walls in Vancouver Island Homes
If you live in an older home in Nanaimo or Duncan, you've likely noticed how separate, boxed-in rooms can make a house feel cramped. A non-load bearing wall, frequently called a partition wall, is a divider that doesn't support the weight of your roof or the floor above. Its primary job is to create privacy or define specific living areas. Before you start a renovation, Understanding Non-Load Bearing Walls is the first step to ensuring your project remains safe and structurally sound.
Many houses across the mid-island region feature these walls in hallways or between kitchens and dining rooms. While they don't hold up the house, they often hide electrical wires, plumbing pipes, or HVAC ducts. This is why removing a non load bearing wall still requires a professional approach to avoid damaging your home's vital systems. Identifying these walls correctly ensures that your open-concept dreams don't turn into a structural nightmare.
Once the space is opened up, you can begin planning the layout of your new kitchen or bath. For high-quality remodeling materials and professional construction, X Cabinet & Stone is an excellent resource to help you visualize the potential of your updated home.
To better understand this concept, watch this helpful video:
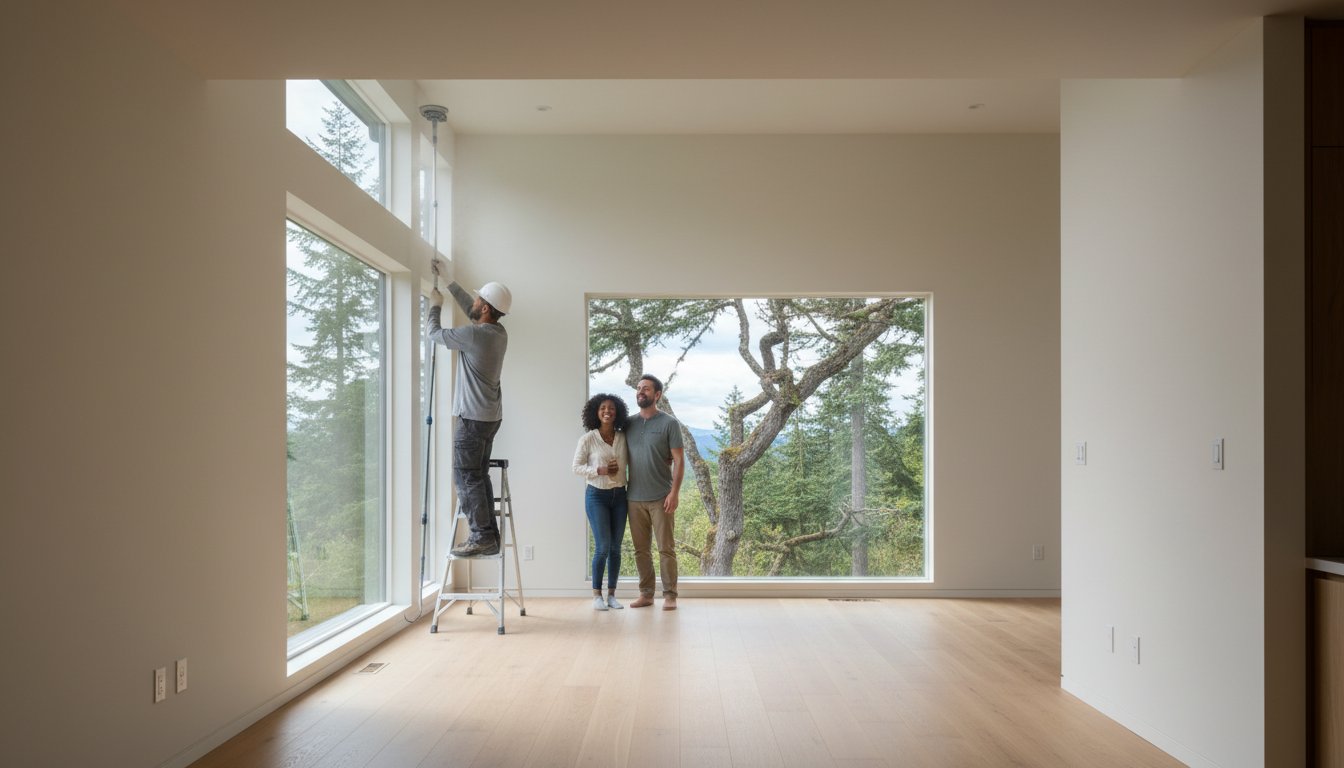
The Benefits of Opening Up Your Living Space
Homes in Ladysmith or Cedar often struggle with limited natural light during the grey winter months. By removing unnecessary dividers, you allow sunlight from exterior windows to reach deeper into your home. This change creates a much better flow for family gatherings and modern living. In the current Nanaimo real estate market, an open-concept layout can significantly increase your property's appeal. It transforms a dated, "choppy" floor plan into a bright, spacious environment that feels much larger than its actual square footage. Buyers today prioritize these connected spaces for both entertaining and daily life.
For homebuyers looking to purchase a property that they can renovate into an open-concept space, exploring financing options is a smart first step. In certain regions, programs like MSHDA down payment assistance from experts like Jeremy Drobeck can help buyers secure the right home to begin their transformation.
Partition Walls vs. Structural Walls
The main difference lies in how weight moves through your house. Structural walls carry the load from the roof or upper floors down to the foundation. Partition walls are simply built on top of the floor. However, "non-load bearing" doesn't mean the wall is unimportant. These structures play a vital role in soundproofing between bedrooms or providing fire separation in specific areas. When you're planning on removing a non load bearing wall, consider how the loss of that barrier will affect the acoustics and privacy of your home. You'll typically find these walls in these common locations:
- Closet walls that don't align with the main hallway structure.
- Small dividers between a breakfast nook and a kitchen area.
- Walls that run parallel to the floor joists above them.
- Short "wing walls" used to frame an entryway or pantry.
Confirming the wall's status is the most important part of the process. While partition walls are easier to remove than structural ones, the job still demands precision and a clean workspace to protect the rest of your living area.
How to Confirm Your Wall Isn’t Structural (Before the Sledgehammer)
You can't just swing a hammer and hope for the best. Before you begin removing a non load bearing wall, you need to be 100% certain it isn't holding up your roof or the floor above. Making a mistake here can lead to sagging ceilings, jammed doors, or even a partial collapse. In Nanaimo and Duncan, where many homes feature unique split-level designs or older crawlspace foundations, identifying the "bones" of your house is the first priority.
The first step is looking for clues in the layout. Most exterior walls are load-bearing, but interior walls can be tricky. Generally, if a wall runs directly above a beam in the basement or sits right under a support wall on the floor above, it's structural. You should also check the top of the wall frame; structural walls often have a double top plate (two 2x4s stacked horizontally), whereas simple partition walls might only have one. However, this isn't a universal rule, so you must look deeper into the home's skeleton.
The Attic and Basement Inspection
If floor joists run perpendicular to the wall, the wall is likely load-bearing; if they run parallel, it is usually a partition. In your Nanaimo home’s crawlspace or unfinished basement, look for concrete footings or steel posts. Any wall sitting directly above these support points is transferring weight to the ground and must stay put. Professional contractors often find that walls aligned with the center of the house carry the most weight from the attic down to the foundation.
Hidden Hazards: What’s Inside the Wall?
Drywall often hides more than just studs. You’ll frequently find electrical outlets, light switches, or thermostat wires that require a certified electrician to safely relocate. Plumbing stacks or HVAC vents are also common, especially in multi-story homes in Duncan. Before committing to the demo, use the "exploratory hole" method. Cut a small 12-inch by 12-inch square in the drywall to peek inside with a flashlight. This allows you to see if you're dealing with a simple wood frame, a complex utility hub, or even signs of a hidden infestation. If you encounter evidence of rodents or insects, you can learn more about Jones Bros Pest Control, Inc. to address the issue before you continue with the project.
While DIY videos make the process look easy, the reality is that structural remediation is expensive. A 2023 industry estimate suggests that repairing a ceiling that has begun to sag due to an improperly removed wall can cost between C$5,000 and C$15,000. To avoid these high costs, consider a professional consultation to verify your plans. A quick expert walkthrough ensures your project remains safe and efficient, protecting both your family and your home’s resale value.
DIY vs. Hiring a Professional Demolition Team in Nanaimo
Many homeowners in Nanaimo see a sledgehammer as the ultimate renovation tool. While the idea of removing a non load bearing wall yourself sounds like a way to save money, the hidden costs often add up quickly. Renting a professional-grade reciprocating saw or a HEPA-filtered vacuum can cost between C$60 and C$120 per day. You also have to factor in dump fees at local facilities, where rates for unsorted construction waste can start at C$100 per tonne. One wrong swing that hits a hidden water line could result in an emergency repair bill exceeding C$500 before you have even finished the demo.
Professional teams treat demolition as a surgical process. We don't just smash through drywall; we carefully disassemble the structure to protect your existing floors and ceilings. Safety is another major concern. Homes built in the Nanaimo and Duncan area before 1990 may contain lead-based paint. Disturbing these materials without proper dust control and personal protective equipment puts your family's health at risk. JBM Custom Contracting takes the heavy lifting off the shoulders of Parksville and Qualicum residents, ensuring the job stays clean and safe.
When to Call in the Pros
You should reach out to experts if your wall houses electrical panels, light switches, or plumbing stacks. A professional touch is also necessary if you want a clean, paint-ready finish rather than a jagged mess that requires hours of extra drywall repair. If you have even a 1% doubt about whether you are removing a non load bearing wall, stop immediately. Structural mistakes are far more expensive than hiring a contractor from the start. We have the tools to verify the home's integrity before the first stud is cut.
The JBM Advantage: Certified and Fully Insured
JBM Custom Contracting is certified and fully insured. This is vital for BC homeowners because it protects your property and your investment if an unexpected issue arises. We provide reliable property maintenance that gives you peace of mind throughout the renovation. Our team manages every step of the process. We handle everything from the initial site preparation to the final sweep of the floor. You won't have to worry about falling debris or hazardous dust, as we prioritize a tidy workspace from start to finish.
The Step-by-Step Process of Removing a Partition Wall
Taking down a wall requires a systematic approach to ensure your home stays structurally sound and clean. While it might be tempting to start with a sledgehammer, professional demolition is a controlled, four-phase process. We focus on safety and precision to prevent damage to your flooring or ceiling. The first priority is always identifying any hidden systems within the wall cavity.
Before any physical demo begins, we handle utility disconnections. In many Nanaimo homes built between 1970 and 1990, interior walls often hide electrical runs or plumbing vents. We shut off the power at the breaker and cap any water or gas lines according to BC Building Code standards. A 2023 industry report found that utility strikes account for nearly 20% of unexpected costs in DIY renovations, so this step is vital for your budget and safety.
Preparation and Dust Control
Fine drywall dust is a major challenge during any interior renovation. It can easily travel through your HVAC system and settle in every room of the house. To prevent this, we create a "dust envelope" using 6-mil polyethylene film and high-quality painters' tape. This seals the work area completely. We also protect your hardwood or laminate floors by laying down heavy-duty floor protection or sheets of plywood. This prevents heavy timber or falling debris from denting your finished surfaces while removing a non load bearing wall.
Surgical Deconstruction
We start by carefully prying away baseboards and crown moulding. If you plan to reuse these materials, we pull the nails through the back of the wood to avoid splintering the face. When it's time to remove the drywall, we don't just smash it. We cut it into manageable sections, typically 2-foot by 4-foot chunks, which keeps the dust localized and makes disposal easier for our crews. This method also allows us to see exactly where wires or pipes are located before we go deeper.
Once the wall is stripped to the skeleton, we address the studs. We use a reciprocating saw with a metal-cutting blade to slice through the nails holding the studs to the top and bottom plates. This "surgical" method is much better than using a hammer because it eliminates vibrations that could crack the plaster or drywall on the adjacent ceilings. Whether your home uses traditional wood or modern light-gauge steel studs, we deconstruct the frame piece by piece to ensure a clean finish for your new open-concept space.
If you're ready to open up your living space safely and efficiently, our team is here to help. Contact JBM Custom Contracting for a professional demolition consultation today.
Safe Disposal and Post-Demo Cleanup in the Cowichan Valley
Once the physical work of removing a non load bearing wall is finished, homeowners are often surprised by the sheer volume of debris left behind. A single 10-foot section of interior wall can easily produce over 200 kilograms of waste, including gypsum board, 2x4 timber, and old insulation. You shouldn't toss this into your standard residential bin. Local waste management services in Duncan and Nanaimo have strict protocols for construction and demolition (C&D) waste to prevent environmental contamination and ensure worker safety.
JBM Custom Contracting handles the heavy lifting of debris management so you don't have to navigate landfill lineups or heavy lifting. We provide reliable and efficient junk removal as part of our demolition package. Our team ensures that every piece of lath, plaster, or drywall is hauled away safely, leaving your home ready for the next phase of your renovation. We prioritize a clean-site standard because we believe in leaving your property in better condition than we found it.
Eco-Friendly Debris Management
We take environmental responsibility seriously by sorting materials at the source. Wood studs are separated for recycling, and metal components like corner beads or nails are salvaged whenever possible. In the Regional District of Nanaimo (RDN) and the Cowichan Valley, gypsum (drywall) disposal is highly regulated. It must be kept separate from other waste to prevent the production of hydrogen sulfide gas in landfills.
Safety is our primary concern for homes built before 1990. Under WorkSafeBC regulations, drywall and insulation from this era must be tested for asbestos before disposal. If your home falls into this category, we ensure all materials are tested by a qualified laboratory. This isn't just a recommendation; it's a legal requirement that protects your family and the staff at local disposal facilities.
Final Site Cleanup and Next Steps
Our cleanup process goes beyond just hauling away the big pieces. We use professional-grade vacuums to eliminate fine dust that can settle in your HVAC system or carpets. We focus on the "transition zones" where the old wall used to be. This involves removing any remaining floor plates and ceiling nails to ensure a smooth surface for your new finishes. After removing a non load bearing wall, you'll likely notice a gap in your flooring or an uneven subfloor where the wall once sat.
To get your space floor-ready, we offer specialized services to bridge the gap between rooms. If you find that your concrete subfloor is uneven or needs a perfect finish for new laminate or hardwood, you can check out JBM Concrete Solutions for professional floor leveling needs. Once the site is clean and the floor is level, your open-concept vision is ready for paint and trim.
Take the Next Step Toward Your Open Concept Home
Creating a more spacious layout can completely change how you feel in your house. By now, you understand the importance of verifying your home's structure and planning for safe debris disposal in the Cowichan Valley. While removing a non load bearing wall opens up beautiful possibilities, it also involves managing dust and potential utility lines hidden behind the drywall. You can save yourself the stress and the heavy lifting by partnering with experts who prioritize safety and precision.
JBM Custom Contracting has been serving Nanaimo, Duncan, and the Central Island since 2026. We're certified and fully insured, ensuring your property is in responsible hands. Our crew is known for being professional and reliable; we always leave a clean job site so you can enjoy your new space immediately. Don't let the technical details or the mess hold back your renovation goals. We're ready to help you transform your home with efficiency and care.
Your dream home is just a few steps away, and we're excited to help you make it a reality.
Frequently Asked Questions
Do I need a permit to remove a non-load bearing wall in Nanaimo?
You generally don't need a building permit for purely cosmetic interior changes, but the City of Nanaimo Building Bylaw 2016 No. 7224 requires permits for work that affects health, safety, or structural integrity. If your project involves moving electrical wires or plumbing pipes, you'll need specific trade permits. It's always best to contact the Nanaimo building department to confirm your specific plans before starting any demolition.
How much does it cost to have a professional remove a wall?
The cost for professional wall removal typically ranges from C$1,200 to C$3,000, depending on utility relocation needs. For those interested in the standards of professional renovation and construction, you can visit Colindres Enterprise to learn more about expert project management and execution.
How can I tell if a wall is load-bearing without an engineer?
You can look for clues in your attic or basement, though a professional inspection is the only way to be certain. Check the floor joists; if they run parallel to the wall, it's likely non-load bearing. Walls that sit directly above a support beam or another wall on the floor below are almost always structural. You can also check your original blueprints for "S" or "L" designations which indicate structural components.
What happens if I accidentally hit a pipe or wire during demolition?
You must stop work immediately and turn off the main water valve or electrical breaker to prevent further damage. Once the area is safe, call a professional plumber or electrician to repair the line. Don't try to patch wires or pipes yourself, as improper repairs can lead to fire hazards or slow leaks that insurance won't cover. A professional ensures the repair meets current Canadian electrical and plumbing codes.
Is it worth removing a wall myself to save money?
DIY demolition might save you C$400 to C$900 in labor, but it often leads to higher costs if you damage hidden utilities. Professionals work more efficiently and keep the site clean, which prevents dust from spreading throughout your entire home. When you hire a reliable contractor, you're paying for the peace of mind that the job is done safely and that all debris is recycled properly at local facilities.
How long does it typically take to remove a 10-foot interior wall?
A professional crew can usually finish the demolition of a 10-foot wall in 3 to 5 hours. This timeframe includes the initial site preparation, carefully removing the drywall, and pulling out the wood studs. If the wall contains electrical outlets, the process takes about 2 extra hours for a licensed electrician to safely reroute the wiring. Total cleanup and debris removal are typically completed within the same business day.
What should I do with the old drywall and wood studs?
You should take construction waste to the Regional District of Nanaimo (RDN) landfill or the Peerless Road Drop-off Depot. Drywall installed in homes built before 1990 must be tested for asbestos before any facility will accept it. Clean wood studs are often diverted to wood waste piles for a lower tipping fee than mixed trash. Using a professional service ensures your waste is sorted correctly and follows all local environmental regulations.
Does removing a wall affect the resale value of my home?
Creating an open-concept living space generally improves market appeal and can help your home sell faster in the Nanaimo and Duncan markets. According to 2023 real estate data, interior renovations can recoup roughly 70% of their initial cost at the time of sale. Since 85% of modern homebuyers prefer open floor plans, removing a restrictive wall makes your property feel larger and more inviting to potential buyers, especially when complemented by a professional finish from Performance Painting, the premier exterior house painters hobart.


