

What if the secret to a ten-year paint job isn't the paint itself, but how you handle the hose before the first brushstroke? You likely already know that power washing before painting exterior surfaces is a vital step, but the fear of damaging your siding or dealing with damp wood that never seems to dry is a common worry. It's stressful to invest time and money into your home only to see the new paint start peeling within months because of hidden dirt or organic growth.
We understand that you want a professional finish without the hassle of a DIY disaster. This guide explains exactly why, when, and how to power wash your home to ensure your new coat of paint sticks for the long haul. We'll walk you through the correct PSI settings to keep your wood safe and provide clear instructions on drying times for our coastal climate. By the end of this article, you'll have the confidence to prepare your home like a pro, ensuring a beautiful result that stands up to the elements.
Why Power Washing Before Painting Your Exterior is Non-Negotiable
The bond between your new paint and your home's siding is the most critical factor for a successful renovation. If the surface isn't perfectly clean, the paint attaches to the debris instead of the wall. This is why power washing before painting exterior surfaces is a step you simply cannot skip. Think of it like trying to apply tape to a dusty box; it might stick for a moment, but it will eventually peel away. To achieve a professional result, you must defeat the three main enemies of exterior paint: dirt, mildew, and chalking—a standard of excellence followed by professional teams like Hudson Line Painters.
Manual scrubbing often fails because it lacks the force needed to reach deep into the texture of wood, brick, or stucco. Standard garden hoses don't provide the PSI required to strip away years of accumulated grime and oxidized paint. Pressure washing provides the mechanical force required to clear the way for a professional-grade finish. Skipping this prep work is a costly mistake. A well-prepped paint job can last ten years or more; however, a rushed job often starts to peel or bubble within two years. You'll end up spending significantly more on labor and materials to fix a failure that was entirely preventable.
To better understand why this mechanical cleaning is so effective for your home's preparation, watch this helpful video:
Breaking Down the 'Chalking' Effect
Old paint doesn't just fade; it actually breaks down into a fine, powdery substance known as chalking. This happens when the paint's resin erodes due to constant UV exposure. You can test for this by wiping your finger across the siding. If a white, chalky residue comes off on your skin, you have a problem. New acrylic paints are designed to bond with solid surfaces. If you paint over chalk, the new layer sits on top of a loose powder, causing it to slide off and flake away almost immediately. This is another reason why power washing before painting exterior walls is the industry standard for ensuring longevity.
Eliminating Organic Growth
Surface dirt is easy to see, but organic growth like mold and mildew is a living threat. These organisms thrive in damp crevices, especially in our coastal climate. If you paint over them, they continue to grow underneath the new film. This creates gas and moisture that leads to immediate bubbling and peeling. Using specialized cleaners during the washing process ensures these spores are neutralized. It's about more than just looking clean; it's about creating a sterile environment where the paint can thrive and protect your home for years to come.
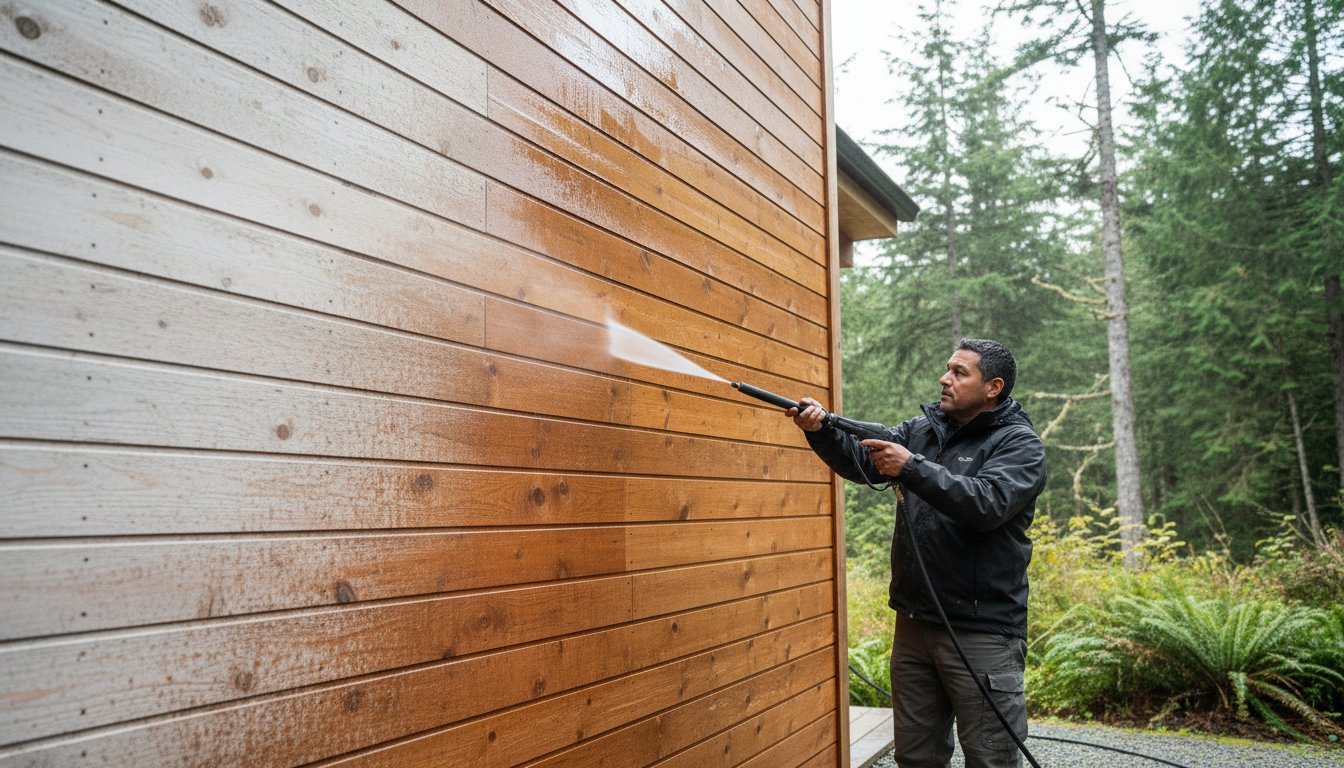
Timing and Technique: How to Pressure Wash Safely
Safety and precision are the foundations of a successful prep job. When you begin power washing before painting exterior surfaces, your equipment settings must match your home's specific materials. For delicate surfaces like wood siding or vinyl, keep your pressure between 1,200 and 1,500 PSI. Using excessive force can gouge wood grain or crack older vinyl panels. Stucco and brick can handle slightly higher pressure, but you should always start low and increase only if necessary. Before you pull the trigger, ensure you're wearing safety goggles and sturdy, non-slip boots. A pressure washer is a powerful tool; it can cause serious injury if it deflects off a hard surface or hits bare skin.
The "top-down" strategy is the most effective way to clean without causing internal damage. Always start at the highest point of your siding and work your way toward the foundation. This prevents dirty runoff from streaking areas you've already cleaned. It's vital to keep the wand angled downward. Spraying upward can force water behind siding laps or into soffit vents, leading to hidden mold growth or electrical issues. Keep your nozzle between 12 and 18 inches away from the wall. Getting too close often causes "etching," which leaves permanent wand marks in wood or removes the protective finish from metal siding. If you're unsure about handling high-pressure equipment, hiring a professional for power washing ensures your home is cleaned thoroughly without the risk of property damage.
Step-by-Step Washing Process
Begin by pre-soaking the siding with clean water to prevent cleaning solutions from drying too quickly. Once the surface is damp, apply a specialized exterior cleaner from the bottom up to ensure even coverage. Use a 40-degree white nozzle for the actual cleaning. This wide spray pattern provides enough force to strip away grime without the concentrated "laser" effect of narrower tips. Be extremely careful around window seals and door frames. A direct hit can tear through aged caulking and send water straight into your living room.
The Critical Drying Window
While many online guides suggest a 48-hour drying period, the reality in Nanaimo and the surrounding coastal areas is often different. Our damp climate and high humidity mean wood can hold moisture far longer than expected. You should use a moisture meter to verify that the wood has reached a 15% moisture threshold before you open a paint can. In many cases, a full 7 days of dry weather is required for deep-seated moisture to evaporate. If the siding feels cool to the touch or looks slightly darker in the grain, it's still too damp to hold paint. Painting too soon traps that water inside, which is the primary cause of premature peeling.
Addressing the Risks: Can Power Washing Damage Your Home?
Power washing before painting exterior surfaces is a high-stakes task because the line between a clean wall and a damaged one is very thin. One of the most common mistakes homeowners make is using excessive pressure on soft wood surfaces like cedar. If you hold the wand too close or use a narrow tip, you can easily gouge the wood or strip away the soft fibers. This doesn't just look bad; it creates an uneven surface that paint cannot properly cover. Beyond the siding itself, high-pressure water can easily shred window screens or shatter the glass on delicate outdoor light fixtures. You must treat these areas with extreme caution to avoid a mounting list of repair bills before you even open a paint can.
The danger of water intrusion is another serious concern. When you use a power washer, it's possible to "inject" water behind your siding laps or under the trim. This happens most often when the wand is angled upward. Once water gets trapped behind the siding, it can soak into the wooden sheathing and insulation. This moisture often has nowhere to go, leading to hidden rot and mold growth that can compromise your home's structural integrity over time. It can also cause the new paint to bubble from the inside out as the trapped moisture tries to escape through the wood grain. Protecting your perimeter is just as important as the walls. High-pressure runoff and cleaning chemicals can quickly wilt your landscaping or kill expensive perimeter plants if they aren't properly shielded.
Wood Furring and How to Avoid It
Wood furring occurs when high pressure shreds the surface fibers of your siding, leaving it looking "fuzzy." This happens almost instantly if the wand stops moving or gets too close to the surface. Once wood is furred, you cannot simply paint over it. The fibers will stand up through the paint, creating a rough, unprofessional texture. The only fix is extensive manual sanding once the wood dries, which adds hours of grueling labor to your project. To prevent this, always keep the wand moving in long, steady strokes and maintain a consistent distance of at least 12 inches from the wood.
Protecting Your Assets
Before you start, take the time to cover outdoor electrical outlets and HVAC units with heavy plastic and waterproof tape. You should also pre-wet your lawn and garden beds. Saturated soil and wet leaves are less likely to absorb the cleaning solutions used during the power washing before painting exterior walls. If you live in an older home in Ladysmith or Duncan, be especially careful about lead paint. Homes built before 1990 may have lead-based coatings. Power washing can blast lead-contaminated chips into your soil, creating a significant health hazard. In these cases, a professional assessment is the safest way to proceed.
Soft Washing: The Professional Alternative for Paint Prep
While traditional high-pressure methods are effective for hard surfaces, soft washing has emerged as a superior choice for many residential projects. Soft washing relies on low pressure combined with specialized cleaning solutions rather than raw mechanical force. This approach is often the safest way to handle power washing before painting exterior walls that feature delicate materials. By using a pressure level similar to a garden hose, you eliminate the risk of the wood furring or water injection we discussed previously. This method is particularly effective for vinyl siding, which can become brittle over time, and older cedar shingles that require a gentler touch.
The real advantage of soft washing is the "kill factor." High pressure alone often just relocates mold and mildew spores or pushes them deeper into the substrate. Soft washing utilizes biodegradable cleaners that neutralize these organisms at the root. This ensures that the living "enemies" of your paint job are truly gone, not just hidden. Because this method is less invasive, it often speeds up the overall prep timeline. There is less risk of damaging seals or creating "fuzzy" wood that requires hours of corrective sanding. If you want a deep clean that protects your home's integrity, our team provides expert Power & Soft Washing services to get your home ready for a flawless finish.
When to Choose Soft Washing Over Power Washing
Deciding which method to use depends on the age and condition of your exterior. If your home has intricate trim, decorative soffits, or older wood that shows signs of weathering, soft washing is the safer path. High pressure can easily snap delicate components or strip away the character of vintage architecture. You can learn more about the specific technical differences in our power washing vs soft washing guide. Generally, if the surface isn't solid concrete or stone, a softer approach is usually better for the long-term health of the structure.
The Role of Bio-Degradable Cleaners
A clean surface is about more than just removing visible mud. Specialized soaps are designed to break down atmospheric pollutants, bird droppings, and oils that settle on your home. These contaminants act as a barrier that prevents paint from gripping the surface. When you perform power washing before painting exterior surfaces using a soft wash technique, these cleaners emulsify the grime so it can be rinsed away easily. We ensure a residue-free finish, which is essential for maximum paint adhesion. This thorough chemical cleaning creates the perfect "tooth" for new acrylic paints to grab onto, ensuring your investment lasts for a decade or more.
Vancouver Island Context: Prep Strategies for Nanaimo & Duncan
Living on the Island means dealing with a coastal environment that doesn't always follow standard DIY guides. While the "Rain Shadow" effect helps some areas, the persistent humidity in Nanaimo and Duncan requires a specific approach to power washing before painting exterior walls. You aren't just fighting common dust; you're battling salt air and deep-seated moisture that can ruin a fresh coat of paint if ignored. Our local weather patterns dictate a much narrower window for success than you might find in drier regions.
Local moss and algae are particularly stubborn here. Unlike dry inland climates, our moisture levels allow organic growth to root deeply into wood and stucco. If you don't use the right cleaning agents during your prep, those spores will survive under the new paint film. This leads to the bubbling and peeling issues we addressed in previous sections. A quick rinse isn't enough for a home in Parksville or Qualicum Beach. You need a method that neutralizes these Island-specific growths at the root to ensure your paint job actually lasts its intended lifespan.
Seasonal Timing on the Island
Timing is everything when you live in Nanaimo and Ladysmith. June and September are the "Goldilocks" months for prep work. June offers the dry stretch needed for surfaces to lose their winter moisture, while September provides a final window of warmth before the autumn rains arrive. Be wary of heavy morning dew. Even on a sunny day, Island dew can reset your drying clock. Always wait until the sun has fully evaporated surface moisture before testing your siding with a moisture meter. Rushing this step in our damp climate is the most common reason for paint failure.
The JBM Difference in Exterior Care
We understand the specific challenges of maintaining a home on the coast. Our team focuses on thoroughness and safety, ensuring that every crevice is treated for organic growth while protecting your windows and landscaping. We don't just blast away dirt; we prepare your home for a decade of protection. We take the guesswork out of PSI settings and nozzle choices, giving you peace of mind that your siding is safe and ready for its new look. Handling a large-scale cleaning project on your own can be overwhelming, especially when you consider the risks of water intrusion or wood damage. If you want to ensure your home is perfectly prepped, Request a professional assessment for your exterior cleaning. We provide the expertise needed for a reliable, long-lasting result.
Ready to Transform Your Home’s Exterior?
A professional paint job is only as good as the preparation underneath it. By understanding the balance between pressure and chemistry, you protect your home from long-term damage like wood furring and internal rot. Mastering the timing of power washing before painting exterior surfaces ensures that your new coat of paint bonds perfectly and stands up to the unique humidity of Vancouver Island. Whether you choose a high-pressure approach for your concrete or a gentle soft wash for your siding, getting the details right today saves you from expensive repainting projects tomorrow.
If you're feeling overwhelmed by PSI settings or the local drying rules, we're here to help. Our team is fully insured and certified, serving homeowners from Nanaimo to Qualicum Beach with specialized soft-wash equipment. We handle the difficult prep work so you can focus on choosing the perfect color for your home. Get a Professional Power Washing Estimate from JBM and start your project with total confidence. Your home deserves a finish that looks beautiful and lasts for years to come.
Frequently Asked Questions
How long should I wait to paint after power washing?
You should wait at least 48 to 72 hours for the surface to dry completely before applying any paint. In our damp coastal climate, this drying period often extends to a full week of clear weather. It is best to use a moisture meter to verify that the wood is below a 15% moisture threshold. Painting too early traps water inside the material, which causes the new finish to bubble and peel within months.
Can I just use a garden hose instead of a pressure washer?
A garden hose does not provide enough pressure to remove the oxidized paint, deep-seated dirt, and microscopic spores required for a successful job. While the siding might look clean to the naked eye, a hose leaves behind a layer of "chalk" and grime that prevents paint from bonding. Proper power washing before painting exterior surfaces ensures the mechanical removal of these contaminants so your investment lasts for years.
Will power washing remove all the old peeling paint?
Power washing is excellent for stripping away loose, flaking, and failing paint, but it won't remove every bit of old coating. It identifies the weak spots where the previous bond has failed. You will still need to perform manual scraping and sanding once the surface is dry to smooth out the edges. Think of the washer as a tool to find the problems, while scraping and sanding provide the final professional finish.
What PSI is safe for washing a house before painting?
A safe pressure range for most residential siding materials is between 1,200 and 1,500 PSI. You should always use a wide 40-degree nozzle to distribute the force evenly across the surface. While concrete driveways can handle much higher pressure—and specialists like Inspire Concrete often utilize this to maintain and clean decorative finishes—using more than 1,500 PSI on wood or vinyl can cause permanent damage. Starting with a lower setting and testing a small area is the most responsible way to begin.
Do I need to use soap when power washing for paint prep?
Using a specialized cleaning solution is vital because clean water alone cannot kill living mold and mildew spores. These organisms thrive in the small crevices of your siding and will continue to grow under a new layer of paint if they aren't neutralized. A biodegradable cleaner breaks down oils, pollutants, and organic growth. This step ensures the surface is chemically clean and ready for maximum paint adhesion.
What happens if it rains after I power wash but before I paint?
If it rains before you start painting, your drying clock unfortunately resets. You must wait for the siding to dry out completely again before opening your paint cans. Rainwater can soak into the wood grain just as deeply as the water from your pressure washer. You typically don't need to wash the house a second time unless the storm blew a significant amount of fresh dirt or mud onto the walls.
Is it better to power wash or hand scrub the exterior?
Power washing is far more efficient and thorough for the large scale of a home's exterior. It reaches deep into textures and crevices that a manual scrub brush simply cannot penetrate. Hand scrubbing is a useful secondary technique for very small, delicate areas or sections near sensitive electrical components. For a standard prep job, the mechanical force of a pressure washer provides a more consistent and reliable surface for the paint.
Can power washing cause mold inside my walls?
Yes, incorrect technique can force water behind your siding laps and into the wall cavities. This usually happens if the wand is angled upward during the cleaning process. Once water is trapped behind the siding, it can soak into your insulation and wooden sheathing, leading to hidden rot and mold growth. Keeping the spray angled downward and staying away from vents and window seals is the best way to prevent this damage.


