

That outdated tile floor has to go, but the thought of the project can be overwhelming. The vision of endless dust, the back-breaking labour, and the risk of damaging your subfloor is enough to make any homeowner hesitate. Add in the challenge of disposing of heavy debris and worrying about what might be lurking in old adhesives, and the job can feel monumental. This is precisely where professional tile removal contractors prove their worth, transforming a difficult, messy demolition into a clean, efficient, and safe process.
This complete guide is designed to give you the confidence to move forward with your renovation. We will walk you through the professional tile removal process from start to finish and break down the typical costs you can expect in Canada. Most importantly, we’ll equip you with the essential questions to ask so you can choose a reliable, insured contractor. Get ready to learn how to achieve a perfectly smooth, prepped subfloor ready for its new look-without the stress or the mess.
Key Takeaways
- Professional tile removal is safer, cleaner, and more efficient, preventing the common pitfalls and potential subfloor damage of a DIY attempt.
- Learn what to expect during a professional service, from initial site preparation and dust control to final subfloor grinding and cleanup.
- Discover the key factors that determine tile removal costs in Canada, such as the type of tile and the condition of the underlayment.
- Use our 5-point checklist to confidently select qualified and insured tile removal contractors who can guarantee a properly prepared surface.
Why Hire Professional Tile Removal Contractors vs. DIY?
For many homeowners, the idea of a DIY tile removal project seems like a practical way to save money on a renovation. However, what appears to be a straightforward task on the surface is often a difficult, messy, and potentially hazardous undertaking. The reality is that hiring professional tile removal contractors provides significant value that goes far beyond simple convenience. It ensures the job is done quickly, safely, and with a superior result that properly prepares your subfloor for new installation.
To better understand the professional process, watch this helpful video:
The Reality of DIY: Dust, Debris, and Damage
Breaking up ceramic, porcelain, or stone tile generates an overwhelming amount of fine crystalline silica dust, a known respiratory hazard. Without proper containment, this dust can contaminate your entire home. Furthermore, using incorrect tools like hammers and pry bars often leads to significant damage to the subfloor-gouges, cracks, and uneven surfaces that will require costly repairs. Finally, you are left with tons of heavy debris that must be hauled away and disposed of according to local Canadian municipal regulations, a challenging and expensive task.
The Professional Advantage: Specialized Tools and Techniques
Professional tile removal contractors arrive with specialized equipment designed for efficiency and safety. This includes powerful floor scrapers, grinders to remove thin-set mortar, and industrial-grade vacuums with HEPA filters that capture harmful dust at the source. We use advanced dust containment methods, such as sealing off the work area with plastic barriers and using negative air machines, to keep your home clean. A job that could take a homeowner a full week of hard labour can be completed safely and efficiently by a professional crew in just a day.
Safety First: Identifying and Handling Potential Hazards
Older homes in Canada present unique risks. In properties built before the 1990s, the black mastic (adhesive) used to secure tiles, particularly older vinyl composition tiles, can contain asbestos. Disturbing this material without proper precautions creates a significant asbestos health risk for your family. A professional is trained to identify these potential hazards and follow strict protocols for safe handling and abatement. Choosing a certified and fully insured contractor also protects you from any liability for on-site accidents, providing complete peace of mind.
The Professional Tile Removal Process: What to Expect Step-by-Step
Hiring professional tile removal contractors means investing in a clean, efficient, and thorough process that sets your renovation up for success. At JBM, we believe in transparency, so you know exactly what to expect when our team arrives. Our methodical, four-step process ensures your property is protected, the job is done right, and your subfloor is perfectly prepared for its new covering.
Step 1: On-Site Assessment and Project Preparation
Every project begins with a professional on-site consultation. We measure the square footage and assess the type of tile and underlying adhesive. For older homes in Canada, it's crucial to identify materials that could contain asbestos. If there's any concern, a trained and accredited asbestos professional should be consulted for safe handling. Before any work starts, we meticulously protect your home by covering furniture, sealing off HVAC vents, and laying down protective floor coverings to safeguard surrounding areas.
Step 2: The Removal - Breaking, Lifting, and Scraping
Once your home is secured, our team begins the removal. We use a combination of professional-grade tools, from chipping hammers for stubborn areas to efficient walk-behind floor scrapers for larger spaces. This allows us to work quickly and safely. Our crew methodically breaks, lifts, and scrapes away every piece of tile along with the old thinset or mastic, ensuring no remnants are left behind.
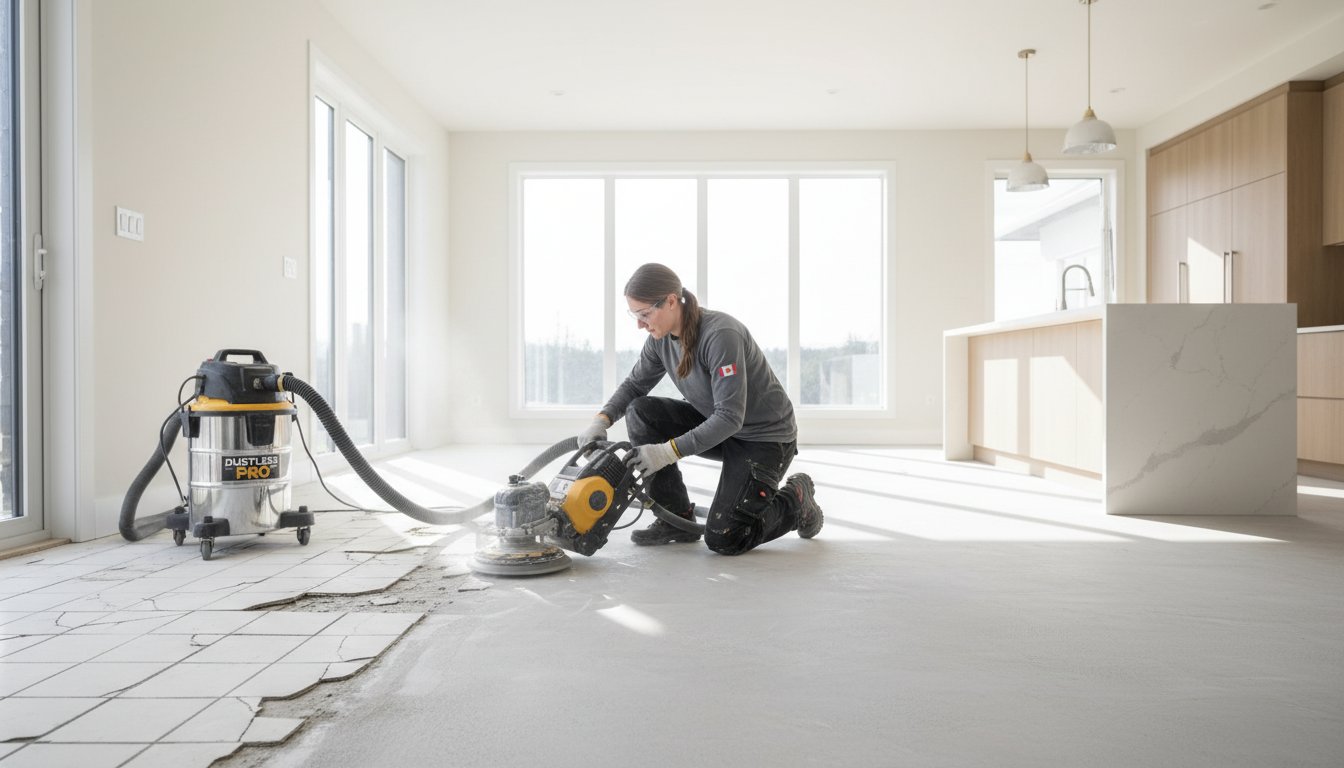
Step 3: Subfloor Grinding and Preparation
This is the most critical step and where professional service truly shines. A perfectly smooth subfloor is essential for a flawless new floor installation. We use industrial concrete grinders fitted with diamond-toothed bits to remove every trace of remaining adhesive. This process eliminates high spots and ensures your subfloor is level, clean, and ready for the next phase of your renovation project.
Step 4: Final Cleanup and Debris Hauling
Our commitment to a clean worksite doesn't end with the removal. We perform a comprehensive cleanup, using HEPA-filtered vacuums to capture fine dust particles. All surrounding surfaces are wiped down to leave your space spotless. Finally, we load all tile and construction debris and haul it away for proper, responsible disposal. Your property is left clean and ready for your flooring installer.
Ready for a professional, clean removal that prepares your home for the perfect new floor? Request your free estimate today.
Understanding Tile Removal Costs: Key Factors That Influence Price
One of the first questions every property owner asks is, "How much will this cost?" While it's easy to look for a simple price per square foot, a professional quote from reliable tile removal contractors accounts for several critical factors. Understanding these variables helps you see the true value in a professional service and ensures there are no surprises down the line.
A transparent breakdown of costs is a hallmark of a trustworthy contractor. It shows they have thoroughly assessed the job and are committed to a safe, efficient, and clean process from start to finish.
Primary Cost Drivers: Area Size and Tile Type
The total square footage of the area is the baseline for any estimate. However, the type of tile is equally important. Removing standard ceramic or porcelain tile is often more straightforward than tackling dense, heavy natural stone like slate, marble, or travertine, which requires more intensive labour and specialized equipment. Furthermore, small, intricate areas like bathrooms or entryways may have a higher per-square-foot cost than a large, open basement due to the detailed work and numerous cuts required.
Secondary Factors: Subfloor and Adhesive Type
The material beneath your tile significantly impacts the project's complexity. Removing tile from a concrete slab often involves heavy-duty grinding to smooth the surface, whereas working on a wood subfloor demands greater care to prevent damage. The original adhesive is another key variable; a thick mortar bed or a stubborn epoxy thinset will require far more time and effort to remove than a standard adhesive. In Canadian homes built before 1990, there is also a risk that the tile or adhesive contains asbestos. Due to the serious health hazards of asbestos, any required testing and abatement will add to the project scope and cost.
What a Professional Quote Should Always Include
To protect your investment and property, a comprehensive quote should be completely transparent. Any professional estimate you receive should clearly outline the following:
- Labour, Equipment, and Disposal: A detailed breakdown of all associated costs, including fees for machinery and proper debris removal.
- Dust Control and Site Protection: An explicit mention of the methods used to contain dust and protect your home and air quality.
- Insurance and Licensing: Confirmation of proper liability insurance and WSIB coverage for all workers on site.
A quote that includes these details demonstrates a commitment to professionalism and safety, giving you the confidence that the job will be done right. For a detailed and reliable estimate for your project, contact the team at jbmcustomcontracting.com.
How to Choose the Right Tile Removal Contractor: A 5-Point Checklist
Once you’ve decided to hire a professional, the next step is choosing the right one. This decision significantly impacts the quality, safety, and cleanliness of your project. A thorough vetting process protects your investment and ensures peace of mind. Use this simple checklist to confidently select a dependable partner for your renovation.
1. Verify They Are Licensed and Fully Insured
This is your first and most crucial step. A professional contractor must provide proof of both general liability insurance and workers' compensation coverage (like WSIB in Ontario). This protects you, the homeowner, from any liability for workplace accidents or property damage. Don’t just take their word for it-ask to see the documents. This is a non-negotiable sign of a legitimate business.
2. Inquire About Their Dust Control Process
Tile removal generates a massive amount of fine, harmful silica dust. A contractor who downplays this is a major red flag. Ask them to describe their dust containment strategy. Look for key terms like HEPA-filtered vacuums, negative air machines, and plastic barrier containment systems. A commitment to a clean and safe work environment is the mark of true professionals.
3. Review Past Work and Customer Testimonials
Reputable tile removal contractors are proud of their work and happy to prove it. Ask to see a portfolio of before-and-after photos from projects similar to yours. Check their online reputation on platforms like Google or HomeStars. Positive, detailed reviews from past clients are a strong indicator of reliable service and high-quality results.
4. Get a Detailed, Written Estimate
Never accept a verbal quote. A professional estimate should be a detailed, written document that outlines the full scope of work, including floor preparation, dust control methods, debris disposal, and the total cost. This allows you to compare quotes accurately. At JBM Custom Contracting, we provide transparent, itemized estimates to ensure you know exactly what you’re paying for. Get yours today!
5. Assess Their Professionalism and Communication
Pay attention to the small details. Do they answer your calls promptly? Did they arrive on time for the consultation? Do they listen to your questions and provide clear, confident answers? A contractor who is professional and communicative from the start is likely to maintain that standard throughout the entire project, delivering a service you can trust.
Start Your Renovation with a Flawless Foundation
Choosing the right professional for your tile removal is the critical first step toward a successful renovation. While a DIY approach can seem tempting, hiring an expert ensures the job is done safely, efficiently, and correctly, preventing costly damage and delays. Understanding the process, key cost factors, and what to look for in a contractor empowers you to make a confident decision for your home, and this advice applies to all trades. For a benchmark on quality, the portfolio of an experienced company like Performance Painting can provide excellent examples of professional work, regardless of your location.
When you're ready to partner with professional tile removal contractors, look for a team that delivers on its promises. At JBM Custom Contracting, we provide a service you can trust. As a certified and fully insured company, we guarantee professional, reliable, and efficient work on every project. Our use of advanced dust control systems also ensures we leave your home clean and ready for the next phase.
Ready for a clean slate? Schedule your professional tile removal consultation with JBM today! Let our team provide the perfect base for your beautiful new floors.
Frequently Asked Questions About Tile Removal
How long does professional tile removal usually take?
The timeline for professional tile removal depends on the area's size and complexity. A standard bathroom floor (around 50-70 sq. ft.) can often be completed in 3-5 hours. A larger area, like a kitchen or basement (200-300 sq. ft.), might take a full day. Factors such as the type of tile, the underlying adhesive, and the condition of the subfloor can also affect the duration. We always provide a reliable time estimate during your free consultation.
How much dust should I really expect, even with professional containment?
While tile removal is inherently dusty, our professional process drastically minimizes its spread. We use industry-grade dust containment systems, including sealing off the work area with plastic sheeting and employing negative air machines with HEPA filters to capture airborne particles at the source. While a very fine layer of dust may settle in the immediate vicinity after we leave, our goal is to ensure the rest of your home remains clean and unaffected by our work. To understand how a professional service can restore your carpets after a renovation, you can learn more about Lake Geneva Carpet Cleaning.
What happens if you find asbestos in the flooring adhesive?
Client and crew safety is our top priority. If we suspect the presence of asbestos, often found in black mastic adhesive in older Canadian homes, all work stops immediately. As per provincial regulations, a certified asbestos abatement company must be brought in to test and safely handle the material. We are trained to recognize potential asbestos-containing materials and will guide you through the necessary steps to ensure your home is remediated safely and legally before any further work proceeds.
Can you remove tile from walls, like in a shower or a kitchen backsplash?
Absolutely. We are fully equipped to handle tile removal from vertical surfaces. Our team has extensive experience safely removing tiles from shower surrounds, bathroom walls, and kitchen backsplashes. We work with precision to remove the tile and thin-set mortar while minimizing damage to the underlying drywall or backer board. This prepares the surface properly for your new installation, ensuring a clean and professional finish for your renovation project.
Do I need to be out of the house during the removal process?
While you are not required to leave your home, we do recommend it for your comfort. The process can be quite loud and, despite our containment efforts, it's best to keep the work area clear of people and pets. For smaller jobs confined to a single room like a bathroom, you can comfortably stay in another part of the house. For larger, multi-room projects, you may find it more convenient to be off-site during the main removal phase.
Will the removal process damage my baseboards or walls?
Our professional tile removal contractors take every precaution to protect your property. To prevent damage and allow for a clean removal right to the edge of the floor, we typically remove baseboards carefully before work begins so they can be reinstalled later. While minor scuffs to the lower part of the wall are sometimes unavoidable, we work meticulously to protect all surrounding surfaces. Our goal is to leave the space clean and ready for the next stage of your project.
Do you also install new flooring after the removal is complete?
Our core expertise lies in providing safe, efficient, and clean demolition and removal services. We specialize in preparing your subfloor perfectly for the next step. While we do not typically perform the new flooring installation ourselves, we work closely with many of the top flooring installers in the area. We are happy to provide recommendations for trusted, high-quality installation partners to ensure your project is completed seamlessly from start to finish.
Tile removal is often just one part of a larger home update, especially in a kitchen. Once you have a clean slate for the floor, it's a great time to consider other high-impact changes like refinishing your cabinets. This combination can completely transform the look of the room. For an example of how professional cabinet refinishing is done, companies like Painting Kitchen Cabinet Denver specialize in creating a durable, factory-like finish that revitalizes the entire space. Similarly, you can check out Cabinet Refinishing Boulder for another example of high-quality local services.
Similarly, the dust and disruption from floor removal can often scuff up walls, making a fresh coat of paint another logical next step. While based in Australia, the portfolio of a long-standing business like Performance Painting can serve as a great example of the professional, clean finish that completes a renovation project, offering a benchmark for quality wherever you are.


